
GestióIP è un software automatizzato per la gestione degli indirizzi IPv4/IPv6 (IPAM) basato sul web. È dotato di potenti funzioni di rilevamento della rete e di tracciamento IP e offre funzioni di ricerca e filtro sia per le reti che per l’host, consentendo espressioni equivalenti al motore di ricerca Internet. Ciò consente di trovare facilmente e rapidamente le informazioni di cui gli amministratori hanno spesso bisogno. GestióIP IPAM è un software gratuito.
Nel seguente articolo mostrerò i semplici steps da seguire per l’installazione di GestioIP su Ubuntu Server 22.04
Per maggiori info e dettagli riaguardo questo potentissimo prodotto visitare il sito:
https://www.gestioip.net/index.html
INSTALLAZIONE DEI PREREQUISITI
Installare i seguenti prerequisti con il comando:
|
0 |
sudo apt-get install libapache2-mod-perl2 apache2 mysql-server |
CONFIGURAZIONE DEL DATABASE
Accedere al MySQL con il comando:
|
0 |
sudo mysql -u root |
Quindi digitare il comando:
|
0 |
use mysql; |
Dovremmo vedere il seguente Output
|
0 1 2 |
Reading table information for completion of table and column names You can turn off this feature to get a quicker startup with -A Database changed |
Quindi digitare il seguente comando:
|
0 |
select Host, User, plugin from user where user="root"; |
Dovremmo vedere il seguente Output
|
0 1 2 3 4 5 |
+-----------+------+-------------+ | Host | User | plugin | +-----------+------+-------------+ | localhost | root | auth_socket | +-----------+------+-------------+ 1 row in set (0.00 sec) |
Se il plug-in di root è impostato su qualcosa di diverso da “mysql_native_password”, (nel mio caso è impostato su auth_socket) modificarlo con il seguente comando in mysql:
|
0 |
ALTER USER 'root'@'localhost' IDENTIFIED WITH mysql_native_password BY 'password'; |
Quindi fare un flush dei privilegi con il comando:
|
0 |
FLUSH PRIVILEGES; |
Provare ad eseguire nuovamente il comando:
|
0 |
select Host, User, plugin from user where user="root"; |
Se è tutto OK dovremmo vedere il seguente Output
|
0 1 2 3 4 5 |
+-----------+------+-----------------------+ | Host | User | plugin | +-----------+------+-----------------------+ | localhost | root | mysql_native_password | +-----------+------+-----------------------+ 1 row in set (0.00 sec) |
Quindi applicare alcune impostazioni di sicurezza di base al database eseguendo lo script mysql_secure_installation con il comando:
|
0 |
sudo mysql_secure_installation |
Quindi seguire il seguente listato facendo attenzione a cambiare la password di root:
|
0 1 2 3 4 5 6 7 8 9 10 11 12 13 14 15 16 17 18 19 20 21 22 23 24 25 26 27 28 29 30 31 32 33 34 35 36 37 38 39 40 41 42 43 44 45 46 47 48 49 50 51 52 53 54 55 56 57 58 59 60 61 62 63 64 |
Securing the MySQL server deployment. Enter password for user root: VALIDATE PASSWORD COMPONENT can be used to test passwords and improve security. It checks the strength of password and allows the users to set only those passwords which are secure enough. Would you like to setup VALIDATE PASSWORD component? Press y|Y for Yes, any other key for No: y There are three levels of password validation policy: LOW Length >= 8 MEDIUM Length >= 8, numeric, mixed case, and special characters STRONG Length >= 8, numeric, mixed case, special characters and dictionary file Please enter 0 = LOW, 1 = MEDIUM and 2 = STRONG: 0 Using existing password for root. Estimated strength of the password: 50 Change the password for root ? ((Press y|Y for Yes, any other key for No) : y New password: Re-enter new password: Estimated strength of the password: 100 Do you wish to continue with the password provided?(Press y|Y for Yes, any other key for No) : y By default, a MySQL installation has an anonymous user, allowing anyone to log into MySQL without having to have a user account created for them. This is intended only for testing, and to make the installation go a bit smoother. You should remove them before moving into a production environment. Remove anonymous users? (Press y|Y for Yes, any other key for No) : y Success. Normally, root should only be allowed to connect from 'localhost'. This ensures that someone cannot guess at the root password from the network. Disallow root login remotely? (Press y|Y for Yes, any other key for No) : y Success. By default, MySQL comes with a database named 'test' that anyone can access. This is also intended only for testing, and should be removed before moving into a production environment. Remove test database and access to it? (Press y|Y for Yes, any other key for No) : y - Dropping test database... Success. - Removing privileges on test database... Success. Reloading the privilege tables will ensure that all changes made so far will take effect immediately. Reload privilege tables now? (Press y|Y for Yes, any other key for No) : y Success. All done! |
A questo punto la configurazione del database è terminata.
INSTALLAZIONE DI GESTIOIP
Verificare al seguente link l’ultima versione stabile di GestioIP
https://www.gestioip.net/downloads.html
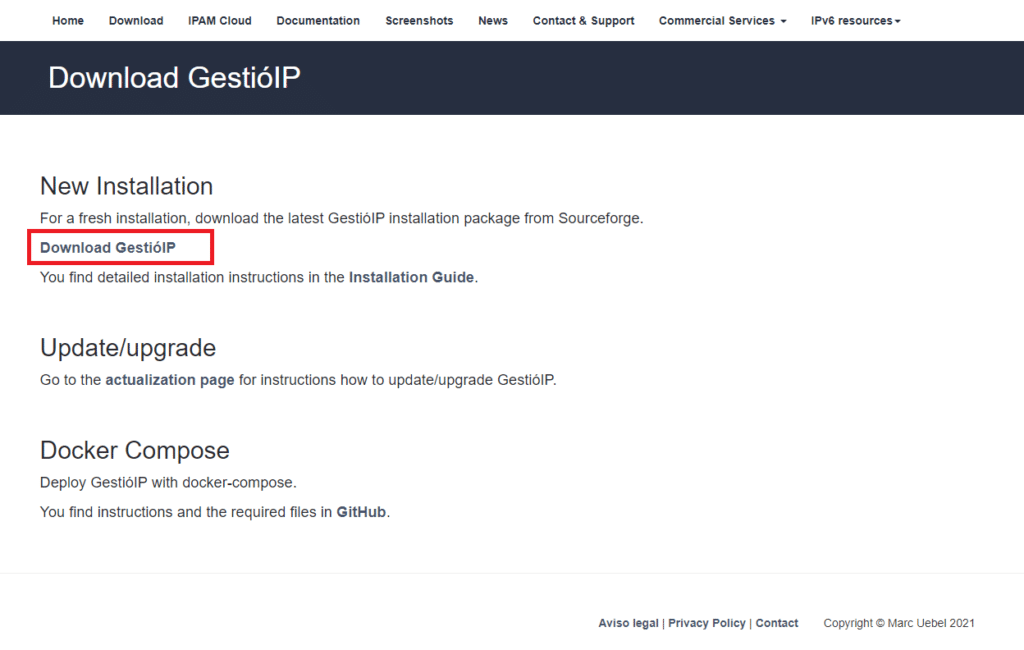
Cliccare su Download GestioIP
NOTA BENE: durante la stesura di questo articolo l’ultima versione disponibile è la 3.5
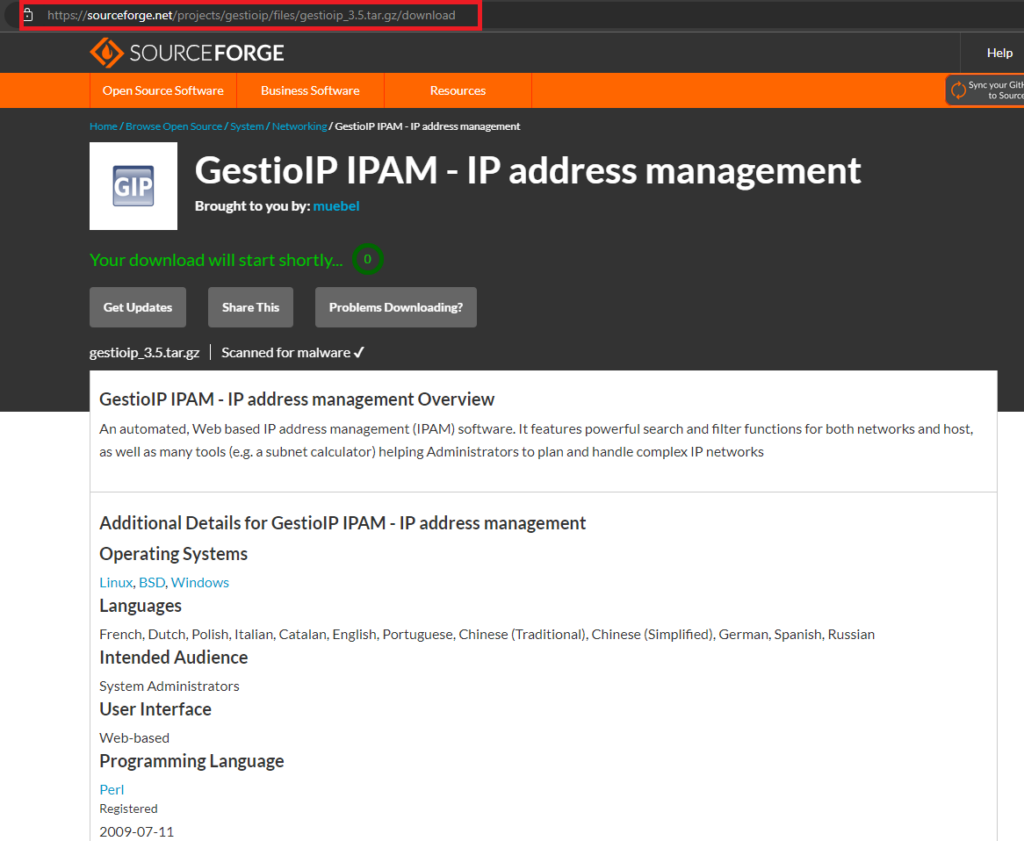
Copiare il link di Sourceforge che viene aperto
Quindi eseguire il comando dalla shell del Server Ubuntu per scaricare il pacchetto di installazione di GestioIP:
|
0 |
wget http://sourceforge.net/projects/gestioip/files/gestioip_3.5.tar.gz |
Estrarre il file zip con il comando:
|
0 |
sudo tar zxvf gestioip_3.5.tar.gz |
Quindi spostarsi nella cartella gestioip_3.5 con il comando:
|
0 |
cd gestioip_3.5/ |
Procedere all’installazione di GestioIP con il comando:
|
0 |
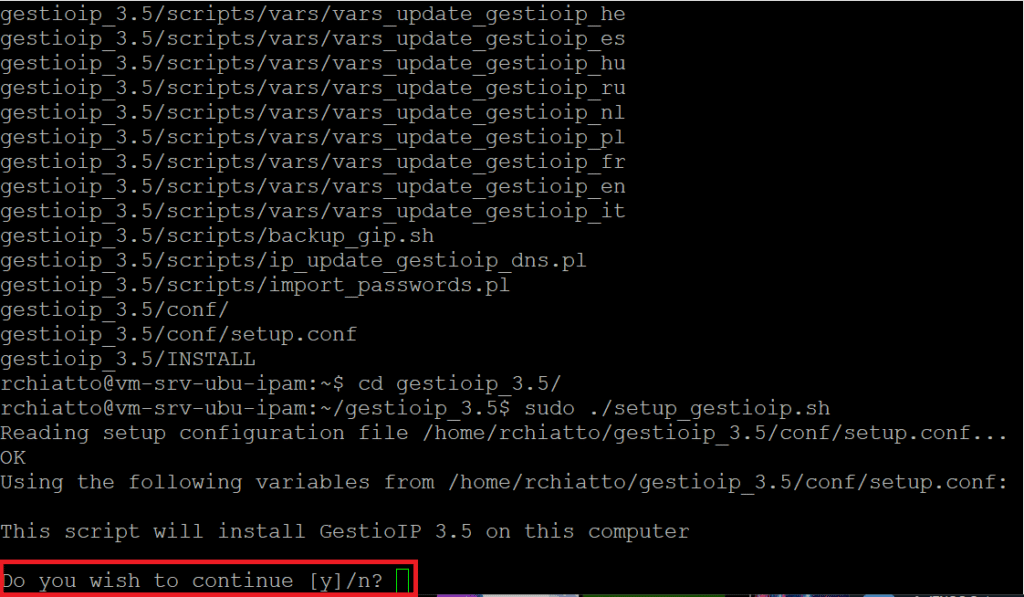
sudo ./setup_gestioip.sh |
Cliccare Y quindi Invio
Questo script recupererà tutti i pacchetti richiesti da Internet e li installerà automaticamente.
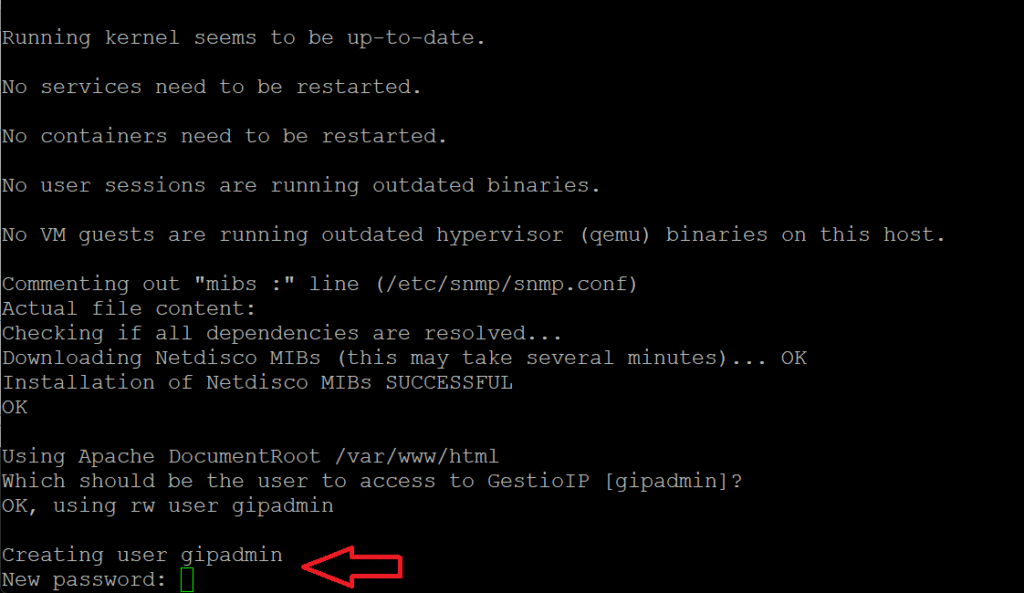
Durante l’installazione il programma di installazione ti farà un paio di domande riguardanti l’utente Apache, il file di configurazione di Apache e i moduli Perl ecc., basta premere INVIO o digitare Y per continuare con l’installazione.
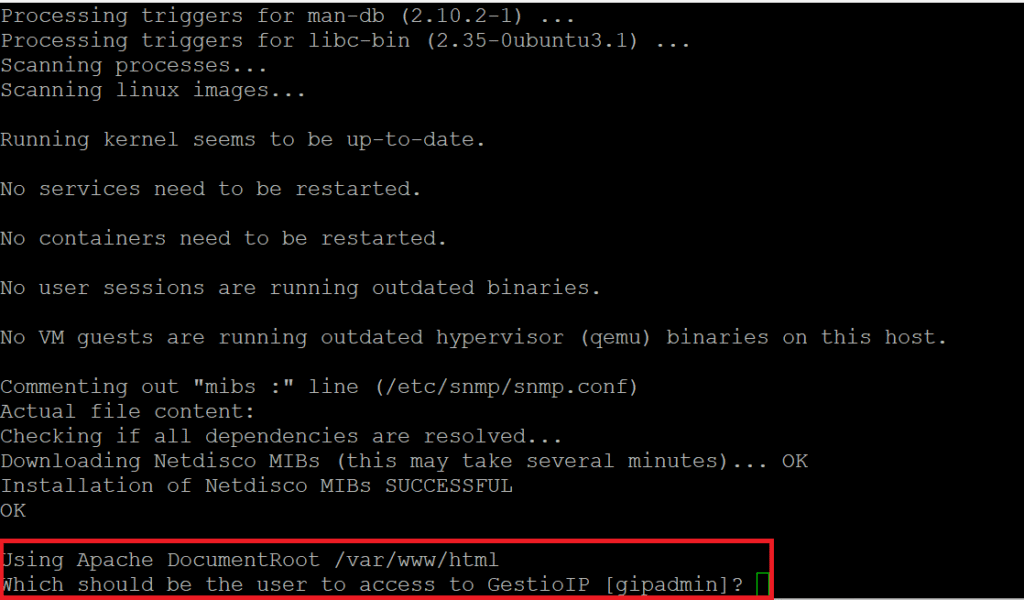
Premere Invio per confermare l’utente di accesso a GestioIP (gipadmin)
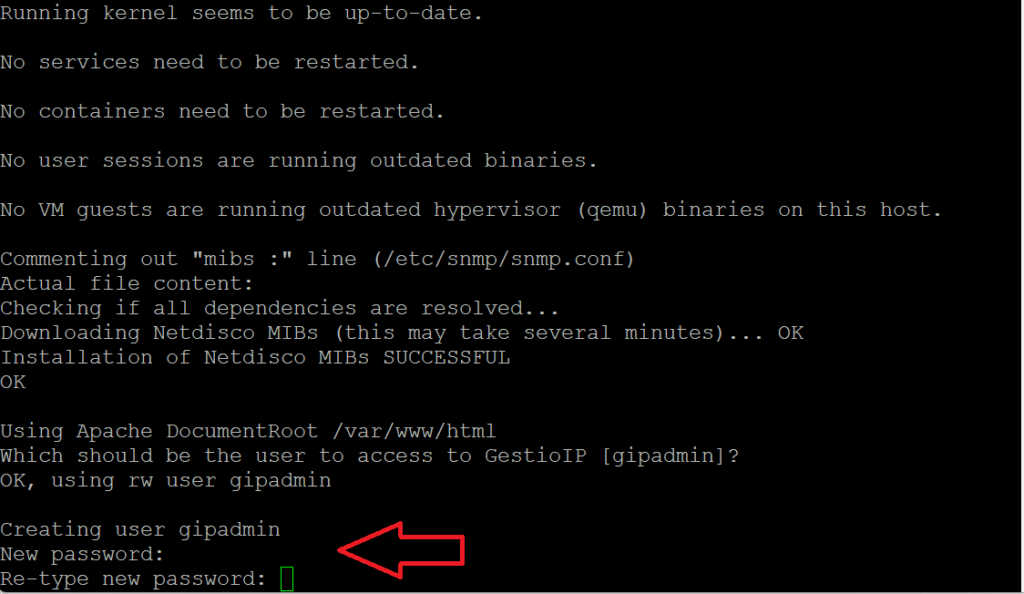
Inserire la password dell’utente gipadmin quindi Invio
Reinserire nuovamente la password quindi premere Invio
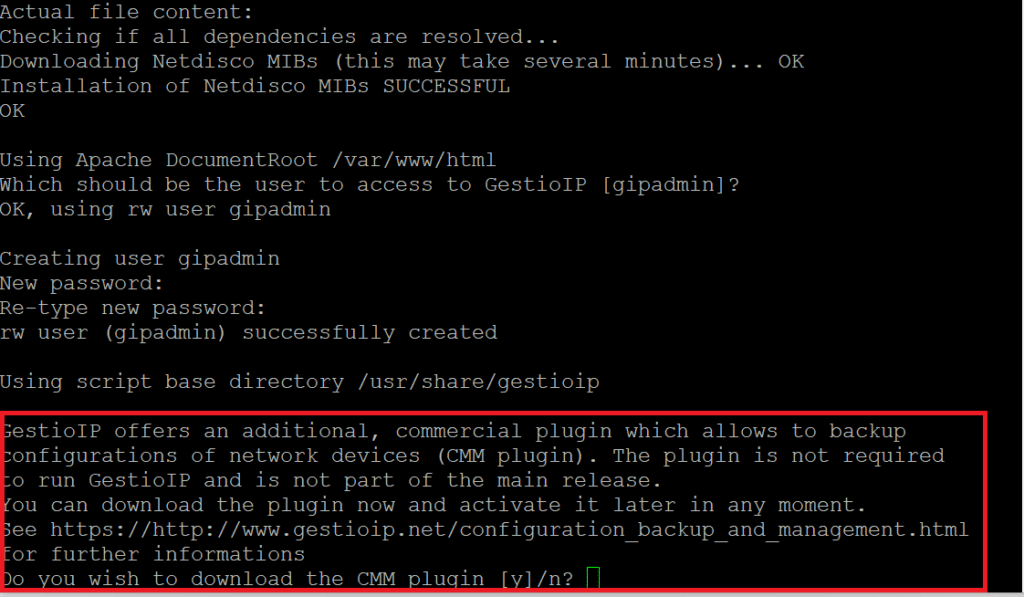
Se non si intende installare il plugin Commerciale CMM cliccare N quindi Invio
ATTENZIONE: GestioIP offre un plug-in commerciale aggiuntivo che consente il backup delle configurazioni dei dispositivi di rete (plugin CMM). Il plugin non è richiesto per eseguire GestioIP e non fa parte della versione principale. E’ possibile scaricare il plugin ora e attivarlo successivamente in qualsiasi momento.
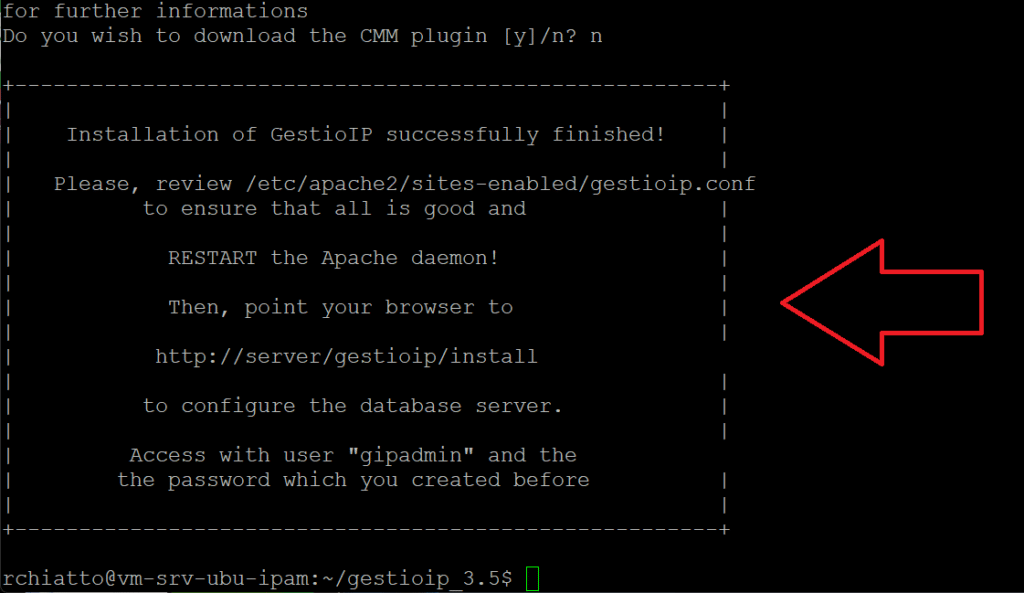
A questo punto l’installazione è conclusa
Procedere con il riavvio di Apache con il comando:
|
0 |
sudo systemctl restart apache2 |
CONFIGURAZIONE DI GESTIOIP VIA BROWSER
A questo punto procediamo alla configurazione di GestioIP via browser
Da un qualsiasi browser eseguire il seguente link:
http://NOME-FQDN-SERVER/gestioip/install/
NOTA BENE: al posto di NOME-FQDN-SERVER inserire il nome FQDN del Server Ubuntu
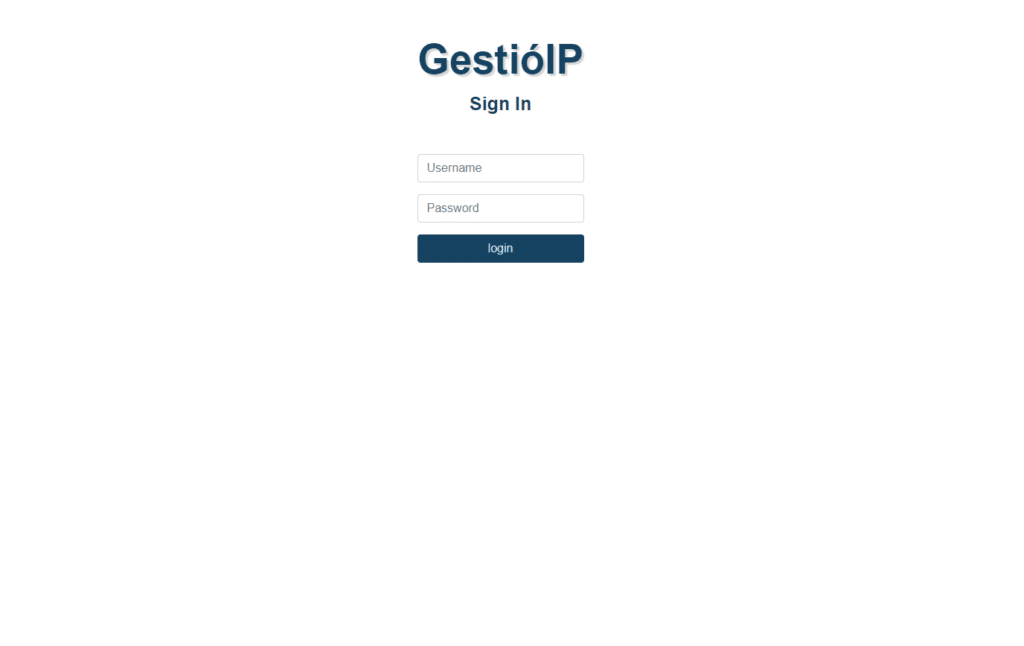
Se abbiamo fatto tutto correttamente dovremmo vedere la pagina di login di GestioIP
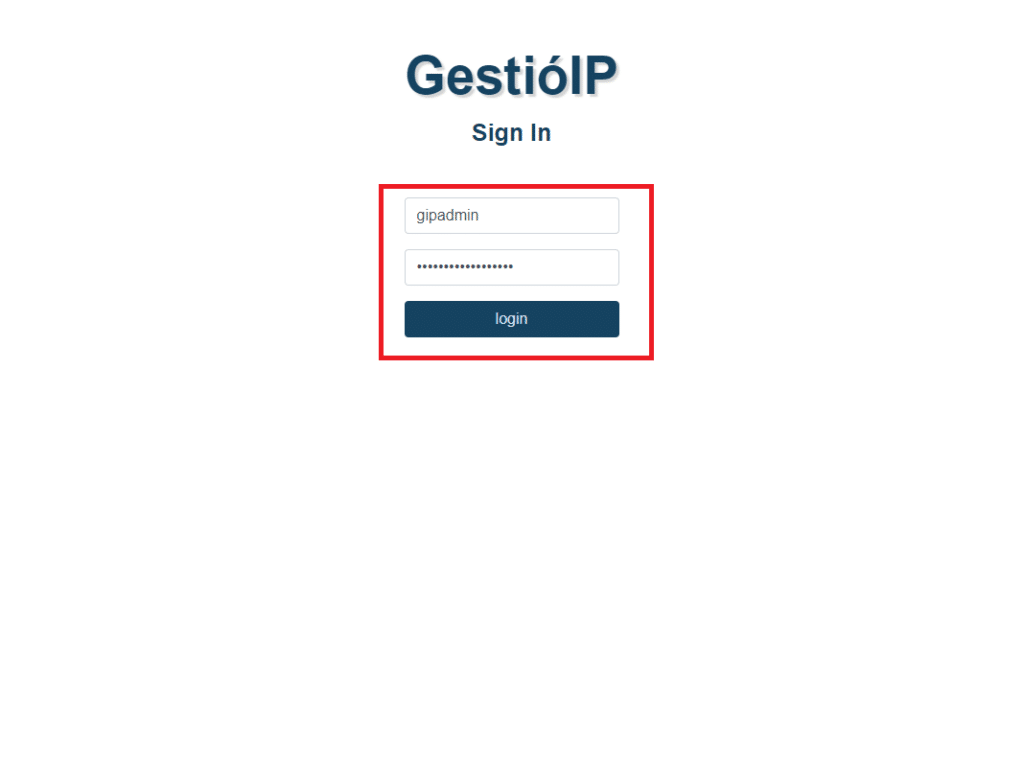
Inserire come user gipadmin e la password quella definita in fase di installazione
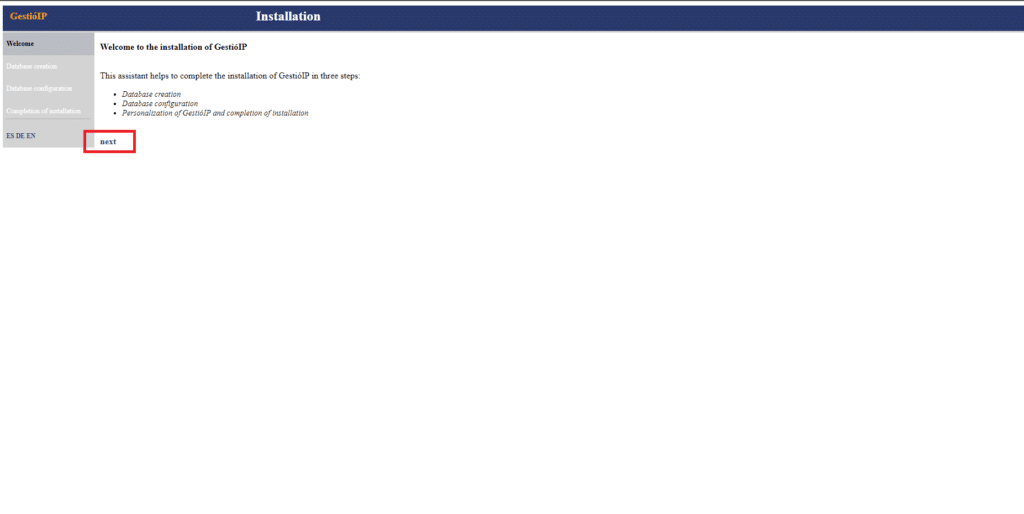
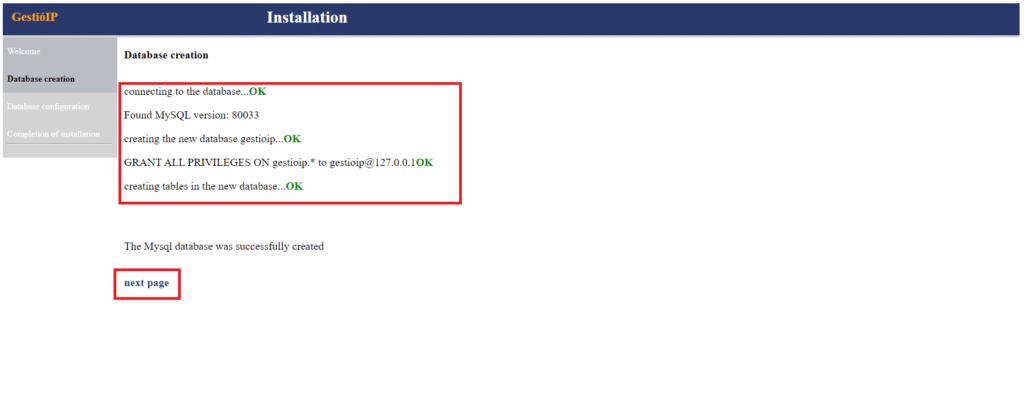
Cliccare Next per procedere con la creazione del database
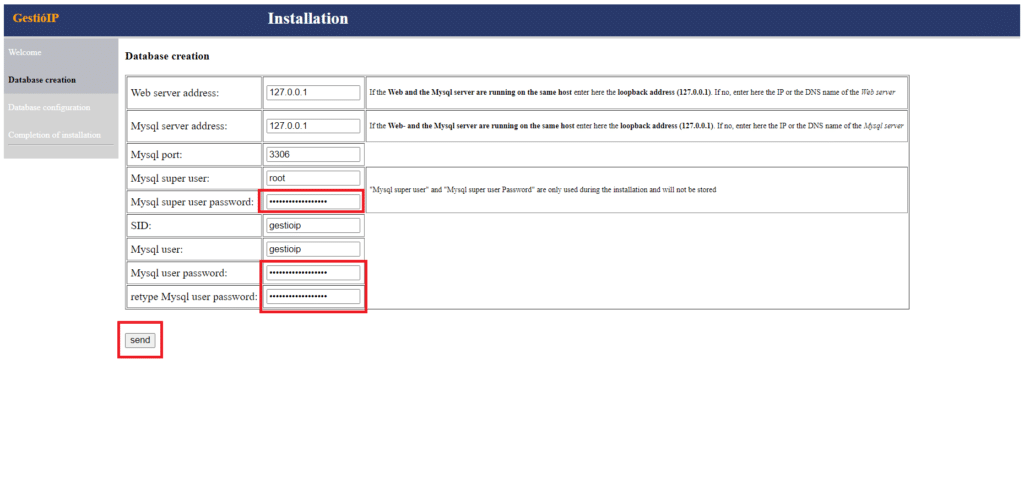
Inserire le password richieste quindi cliccare Send
Verificare che sia tutto OK come mostrato nell’immagine sovrastante quindi cliccare Next Page
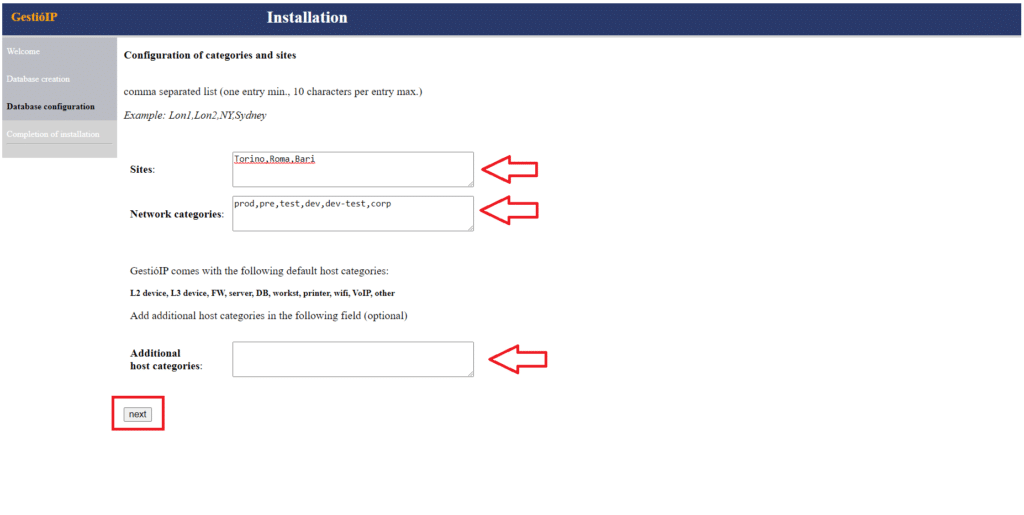
Configurare siti e categorie. Se la tua infrastruttura IT è distribuita in varie località, inserisci le località nella casella di testo Sites.
ATTENZIONE: Devi inserire almeno un sito.
Le categorie di rete sono pensate per classificare le reti. GestióIP propone qui alcune categorie come “prod” per l’ambiente di produzione, “pre” per la pre-produzione o “dev” per le reti dell’ambiente di sviluppo. Modificare le categorie di rete per adattarle alle tue esigenze.
Le categorie di host hanno lo scopo di classificare gli host. Aggiungi tutte le categorie di host aggiuntive di cui hai bisogno.
NOTA BENE: puoi modificare facilmente tutti questi valori in un secondo momento tramite il frontend web.
Cliccare Next per proseguire con la configurazione
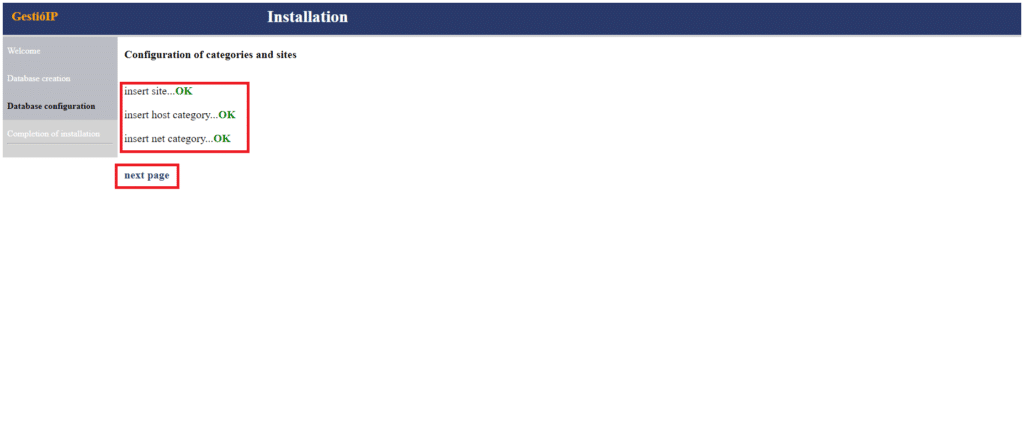
Verificare che sia tutto OK come mostrato nell’immagine sovrastante quindi cliccare Next Page
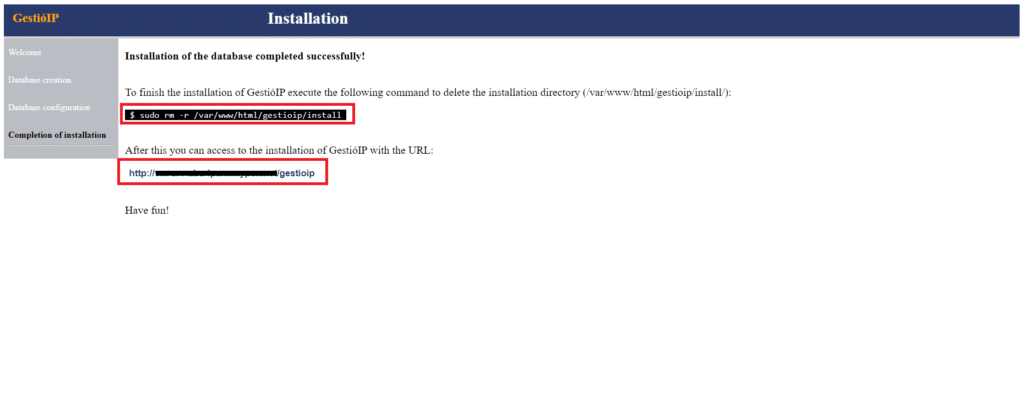
Siamo giunti al termine e prima di chiudere il wizard ricolrdarsi di cancellare da console SSH la cartella di installazione con il comando:
|
0 |
sudo rm -r /var/www/html/gestioip/install |
Dopo aver cancellato la cartella di installazione aprire da un qualsiasi browser il link:
http://NOME-FQDN-SERVER/gestioip
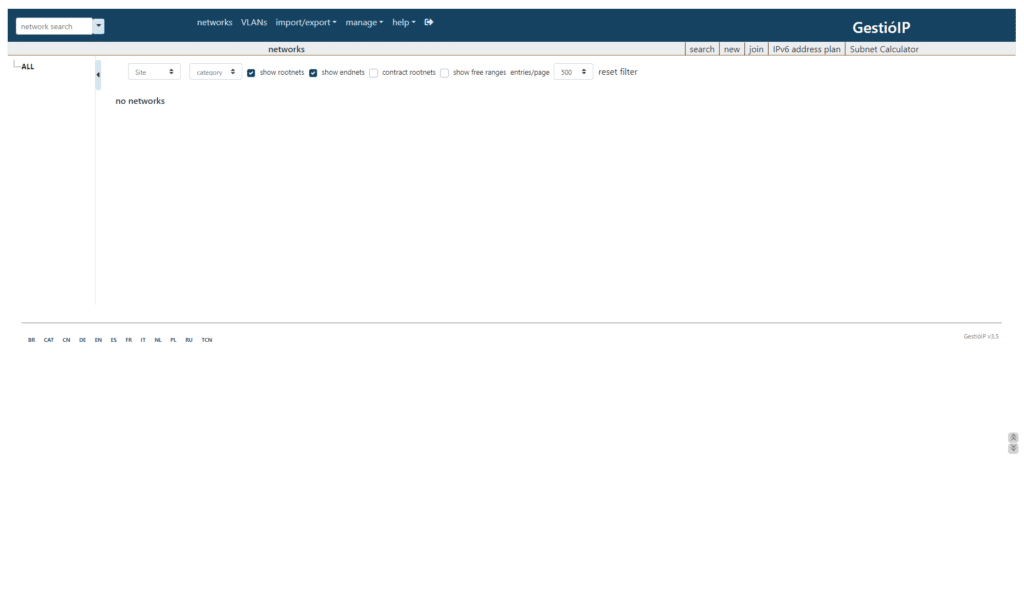
Se è andato tutto buon fine dovremmo accedere alla Dashboard di GestioIP dalla quale è possibile aggiungere VLAN, Network, Hosts e tutto ciò che riguarda un IP Address Management.










![Errore in LibreNMS: Python3 module issue found: ‘Required packages: [‘PyMySQL!=1.0.0’, ‘python-dotenv’, ‘redis>=4.0’, ‘setuptools’, ‘psutil>=5.6.0’, ‘command_runner>=1.3.0’]](https://www.raffaelechiatto.com/wp-content/uploads/2024/09/Errore_in_LibreNMS_Python3_module_issue_found-1080x675.png)












0 commenti