
Ansible AWX è un’applicazione Web front-end gratuita e open source che fornisce un’interfaccia utente per gestire playbook e inventari Ansible, nonché un’API REST per Ansible.
È una versione open source di Red Hat Ansible Tower.
In questo tutorial mostrerò come installare Ansible AWX su Ubuntu 22.04.
Per implementare AWX, sono necessarie alcune infrastrutture Kubernetes come MicroK8, K3 o Minikube.
In questo tutorial utilizzeremo minikube (un cluster Kubernetes a nodo singolo).
Utilizza il seguente URL per l’installazione di minikube
PREREQUISITI
Ubuntu 22.04 LTS Server
Minikube Installato
Minimo 8GB di Ram
Minimo 2 vCPU
20GB di Spazio disco
Account di root o user con diritti di sudo
Per installare Minikube su Ubuntu 22.04 seguire la guida seguente xxxxxxxxxxxxxxxxxxxx
INSTALLAZIONE DI ANSIBLE AWX
Installare GIT con il comando:
|
0 |
sudo apt install git make -y |
Aggiungere il componente Metrics-Server a Minikube con il comando:
|
0 |
minikube addons enable metrics-server |
Dovremmo vedere il seguente output:
|
0 1 2 3 |
* metrics-server is an addon maintained by Kubernetes. For any concerns contact minikube on GitHub. You can view the list of minikube maintainers at: https://github.com/kubernetes/minikube/blob/master/OWNERS - Using image registry.k8s.io/metrics-server/metrics-server:v0.6.4 * The 'metrics-server' addon is enabled |
Avviare Minikube con il seguente comando:
|
0 |
minikube start --vm-driver=docker --addons=ingress |
Dovremmo vedere il seguente output:
|
0 1 2 3 4 5 6 7 8 9 10 11 12 13 14 15 16 17 18 19 20 |
* minikube v1.31.2 on Ubuntu 22.04 * Using the docker driver based on existing profile * Starting control plane node minikube in cluster minikube * Pulling base image ... * Updating the running docker "minikube" container ... * Preparing Kubernetes v1.27.4 on Docker 24.0.4 ... * Verifying Kubernetes components... - Using image gcr.io/k8s-minikube/storage-provisioner:v5 - Using image docker.io/kubernetesui/dashboard:v2.7.0 - Using image docker.io/kubernetesui/metrics-scraper:v1.0.8 - Using image registry.k8s.io/ingress-nginx/controller:v1.8.1 - Using image registry.k8s.io/ingress-nginx/kube-webhook-certgen:v20230407 - Using image registry.k8s.io/ingress-nginx/kube-webhook-certgen:v20230407 - Using image registry.k8s.io/metrics-server/metrics-server:v0.6.4 * Verifying ingress addon... * Some dashboard features require the metrics-server addon. To enable all features please run: minikube addons enable metrics-server * Enabled addons: default-storageclass, storage-provisioner, dashboard, metrics-server, ingress * Done! kubectl is now configured to use "minikube" cluster and "default" namespace by default |
Verificare lo stato di Minikube con il comando:
|
0 |
minikube status |
Dovremmo vedere il seguente output:
|
0 1 2 3 4 5 |
minikube type: Control Plane host: Running kubelet: Running apiserver: Running kubeconfig: Configured |
Quindi verificare lo stato del PODS con il comando:
|
0 |
kubectl get pods -A |
Dovremmo vedere il seguente output:
|
0 1 2 3 4 5 6 7 8 9 10 11 12 13 |
NAMESPACE NAME READY STATUS RESTARTS AGE ingress-nginx ingress-nginx-admission-create-5fjxk 0/1 Completed 0 33m ingress-nginx ingress-nginx-admission-patch-lr6kr 0/1 Completed 1 33m ingress-nginx ingress-nginx-controller-7799c6795f-xqjd8 1/1 Running 2 (4m31s ago) 33m kube-system coredns-5d78c9869d-h4x8z 1/1 Running 2 (4m36s ago) 45m kube-system etcd-minikube 1/1 Running 2 (4m41s ago) 45m kube-system kube-apiserver-minikube 1/1 Running 2 (4m31s ago) 45m kube-system kube-controller-manager-minikube 1/1 Running 2 (4m41s ago) 45m kube-system kube-proxy-k4tf4 1/1 Running 2 (4m41s ago) 45m kube-system kube-scheduler-minikube 1/1 Running 2 (4m41s ago) 45m kube-system metrics-server-7746886d4f-97vzj 1/1 Running 1 (4m41s ago) 5m21s kube-system storage-provisioner 1/1 Running 4 (4m21s ago) 45m kubernetes-dashboard dashboard-metrics-scraper-5dd9cbfd69-fz7cf 1/1 Running 2 (4m42s ago) 36m kubernetes-dashboard kubernetes-dashboard-5c5cfc8747-b5qnt 1/1 Running 2 (4m41s ago) 36m |
Scaricare i seguenti comandi per scaricare AWX Operator:
|
0 1 2 |
git clone https://github.com/ansible/awx-operator.git cd awx-operator/ git checkout 2.6.0 |
Dovremmo vedere il seguente output:
|
0 1 2 3 4 5 6 7 8 9 10 11 12 13 14 15 16 17 |
Note: switching to '2.6.0'. You are in 'detached HEAD' state. You can look around, make experimental changes and commit them, and you can discard any commits you make in this state without impacting any branches by switching back to a branch. If you want to create a new branch to retain commits you create, you may do so (now or later) by using -c with the switch command. Example: git switch -c <new-branch-name> Or undo this operation with: git switch - Turn off this advice by setting config variable advice.detachedHead to false HEAD is now at 822b3a4 Add receptor_log_level (#1444) |
ATTENZIONE: durante la stesura del seguente tutorial la versione di AWX Operator è la 2.6.0 (per verificare l’ultima versione disponibile collegarsi al sito https://github.com/ansible/awx-operator/releases)
Configurare quindi il namespace ansible-awx quindi eseguire il deploy con i comandi:
|
0 1 |
export NAMESPACE=ansible-awx make deploy |
Dovremmo vedere il seguente output:
|
0 1 2 3 4 5 6 7 8 9 10 11 12 13 14 |
namespace/ansible-awx created customresourcedefinition.apiextensions.k8s.io/awxbackups.awx.ansible.com created customresourcedefinition.apiextensions.k8s.io/awxrestores.awx.ansible.com created customresourcedefinition.apiextensions.k8s.io/awxs.awx.ansible.com created serviceaccount/awx-operator-controller-manager created role.rbac.authorization.k8s.io/awx-operator-awx-manager-role created role.rbac.authorization.k8s.io/awx-operator-leader-election-role created clusterrole.rbac.authorization.k8s.io/awx-operator-metrics-reader created clusterrole.rbac.authorization.k8s.io/awx-operator-proxy-role created rolebinding.rbac.authorization.k8s.io/awx-operator-awx-manager-rolebinding created rolebinding.rbac.authorization.k8s.io/awx-operator-leader-election-rolebinding created clusterrolebinding.rbac.authorization.k8s.io/awx-operator-proxy-rolebinding created configmap/awx-operator-awx-manager-config created service/awx-operator-controller-manager-metrics-service created deployment.apps/awx-operator-controller-manager created |
Verificare lo stato del pods dal namesapce ansible-awx con il comando:
|
0 |
kubectl get pods -n ansible-awx |
Dovremmo vedere il seguente output:
|
0 1 |
NAME READY STATUS RESTARTS AGE awx-operator-controller-manager-7dbdd45fd7-8fx9h 2/2 Running 0 76s |
Creare il file AWX per la distribuzione con il comando:
|
0 |
sudo nano awx-deploy.yml |
Quindi inserire all’interno del file le seguenti righe:
|
0 1 2 3 4 5 |
apiVersion: awx.ansible.com/v1beta1 kind: AWX metadata: name: awx spec: service_type: nodeport |
Salvare e chiudere il file di configurazione
Distribuire AWX con il comando:
|
0 |
kubectl create -f awx-deploy.yml -n ansible-awx |
Dovremmo vedere il seguente output:
|
0 |
awx.awx.ansible.com/awx created |
Verificare i pods di ansible-awx con il comando:
|
0 |
kubectl get pods -n ansible-awx |
Dovremmo vedere il seguente output:
|
0 1 2 3 4 |
NAME READY STATUS RESTARTS AGE awx-operator-controller-manager-7dbdd45fd7-8fx9h 2/2 Running 0 17m awx-postgres-13-0 1/1 Running 0 4m47s awx-task-67d76567c-j5qgw 4/4 Running 0 4m17s awx-web-54697c9c7c-m47gv 3/3 Running 0 3m7s |
Verificare lo stato dei servizi con il comando:
|
0 |
kubectl get svc -n ansible-awx |
Dovremmo vedere un output simile al seguente:
|
0 1 2 3 4 5 6 7 8 9 |
NAME READY STATUS RESTARTS AGE awx-operator-controller-manager-7dbdd45fd7-8fx9h 2/2 Running 0 17m awx-postgres-13-0 1/1 Running 0 4m47s awx-task-67d76567c-j5qgw 4/4 Running 0 4m17s awx-web-54697c9c7c-m47gv 3/3 Running 0 3m7s rchiatto@vm-srv-ubu-ansible:~/awx-operator$ kubectl get svc -n ansible-awx NAME TYPE CLUSTER-IP EXTERNAL-IP PORT(S) AGE awx-operator-controller-manager-metrics-service ClusterIP 10.106.82.206 <none> 8443/TCP 18m awx-postgres-13 ClusterIP None <none> 5432/TCP 5m34s awx-service NodePort 10.109.227.115 <none> 80:30771/TCP 5m6s |
E’ possibile monitorare l’installazione di AWX dal pod con il comando:
|
0 |
kubectl logs awx-operator-controller-manager-7dbdd45fd7-8fx9h -n ansible-awx -f |
NOTA BENE: al posto di 7dbdd45fd7-8fx9h inserire il valore relativo alla propria installazione
Per accedere alla dashboard dal sistema Ubuntu stesso, eseguire il seguente comando per ottenere l’URL della dashboard:
|
0 |
minikube service awx-service --url -n ansible-awx |
Dovremmo vedere il seguente output:
|
0 |
http://192.168.49.2:30771 |
Nel caso in cui si vuole accedere dall’esterno del sistema Ubuntu, eseguire il seguente comando kubectl:
|
0 |
kubectl port-forward service/awx-service -n ansible-awx --address 0.0.0.0 10550:80 |
Dovremmo vedere il seguente output:
|
0 |
Forwarding from 0.0.0.0:10550 -> 8052 |
A questo punto aprire da un qualsiasi browser il seguente link:
http://IP_SERVER_ANSIBLE:10550
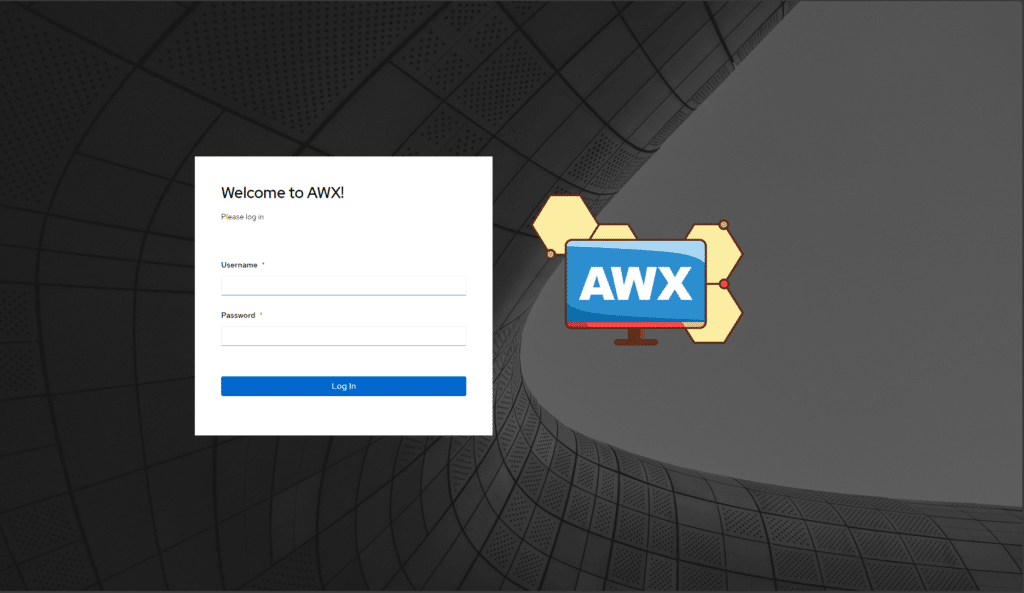
Se è andato tutto a buon fine dovremmo vedere la schermata di login di Ansible AWX
Per recuperare la password dell’utente amministratore, eseguire il seguente comando kubectl:
|
0 |
kubectl get secret awx-admin-password -o jsonpath="{.data.password}" -n ansible-awx | base64 --decode; echo |
Copiare la stringa che compare dopo aver eseguito il comando:
|
0 |
MoiBMIJoNFoC3xUJQC3BKW1BGjvdPpfp |
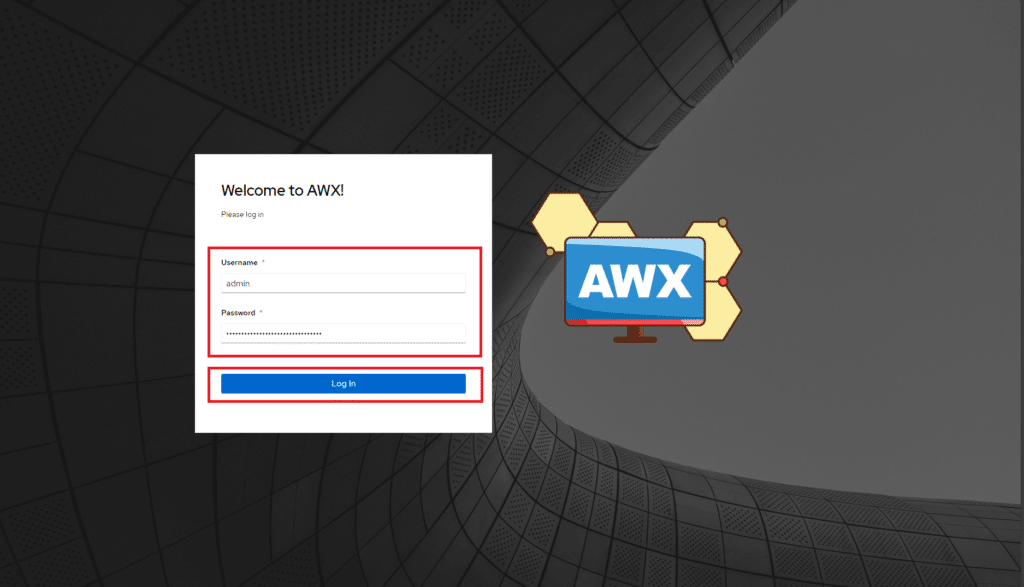
Quindi ritornare al browser ed inserire come utente admin e come password la stringa copiata. Cliccare Login
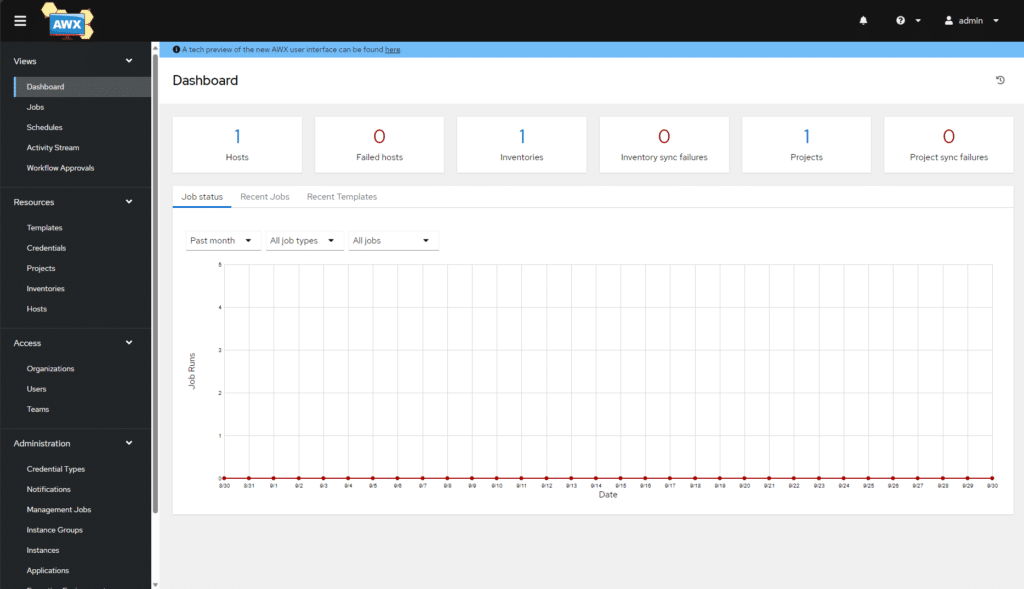
Se è andato tutto a buon fine dovremmo accedere alla Dashboard di Ansible AWX come mostrato nell’immagine sovrastante












0 commenti