
Focalboard è uno strumento di gestione dei progetti open source che può essere utilizzato come desktop.
Fornisce un semplice approccio alla gestione dei progetti simile a strumenti come Trello, Asana, Clickup o Notion.
È inoltre disponibile in 15 lingue diverse e può essere integrato nella piattaforma Mattermost, un’azienda che supporta lo sviluppo dello strumento open source.
PREREQUISITI
Un server con Ubuntu 22.04.
Un nome di dominio valido indicato con l’IP del Server Ubuntu.
Una password di root configurata sul server.
INSTALLAZIONE E CONFIGURAZIONE DI POSGRESQL
Focalboard utilizza PostgreSQL per archiviare i propri dati. Quindi il server del database PostgreSQL deve essere installato sul tuo sistema.
Se non è installato, puoi installarlo con altri pacchetti usando i seguenti comandi:
|
0 1 |
apt-get install curl wget gnupg2 -y apt-get install postgresql postgresql-contrib -y |
Dopo aver installato PostgreSQL, connettersi a PostgreSQL utilizzando il seguente comando:
|
0 1 |
su - postgres psql |
Quindi creare il database e l’utenza con i seguenti comandi:
|
0 1 |
CREATE DATABASE focaldb; CREATE USER focaluser WITH PASSWORD 'PASSWORD'; |
ATTENZIONE: Al posto di PASSWORD inserire la password dell’utente focaluser
Uscire dalla shell PostgreSQL con il comando:
|
0 |
\q |
INSTALLAZIONE E CONFIGURAZIONE DI FOCALBOARD
Come prima cosa tornare sull’utente root con il comando
|
0 |
su |
Quindi inserire la password di root
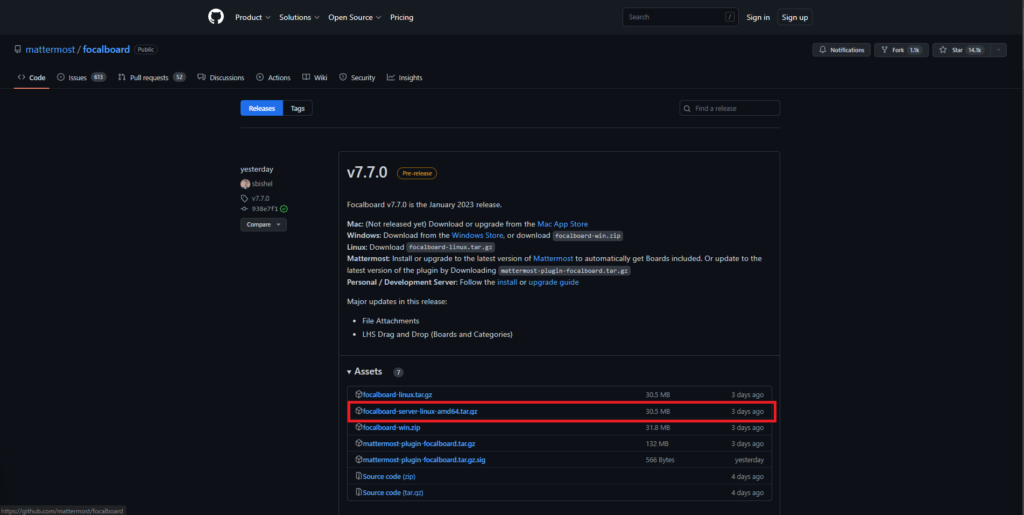
Visitare la pagina di download di Focalboard su GitHub al seguente link
https://github.com/mattermost/focalboard/releases
Dovremmo avere la possibilità di copiare il link dell’ultima relaease
ATTENZIONE: durante la stesura del seguente tutorial la versione di Focalboard disponibile è la 7.7.0
Scaricare il pacchetto di installazione con il seguente comando:
|
0 |
wget https://github.com/mattermost/focalboard/releases/download/v7.7.0/focalboard-server-linux-amd64.tar.gz |
Estrarre il file appena scaricato con il comando:
|
0 |
tar -xvzf focalboard-server-linux-amd64.tar.gz |
Spostare la cartella Focalboard in /opt usando il seguente comando:
|
0 |
mv focalboard /opt |
Editare il file di configurazione di Focalboard con il seguente comando:
|
0 |
nano /opt/focalboard/config.json |
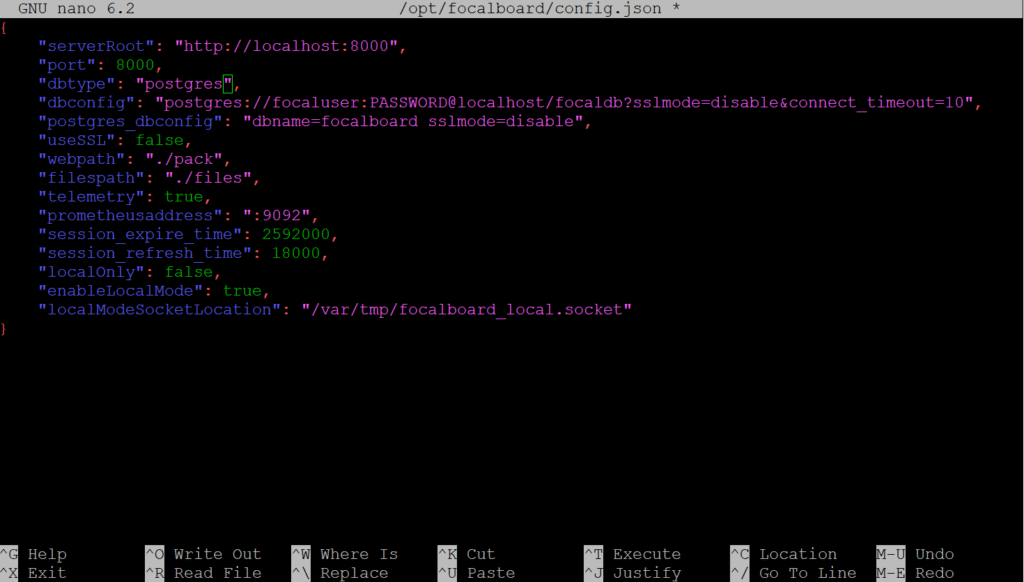
Modificare le seguenti righe che corrispondono al tuo database come mostrato di seguito:
|
0 1 |
"dbtype": "postgres", "dbconfig": "postgres://focaluser:PASSWORD@localhost/focaldb?sslmode=disable&connect_timeout=10", |
ATTENZIONE: al posto di PASSWORD inserire la password definita in precedenza
Se è tutto corretto dovremmo vedere una schermata come quella sovrastante
Salvare e chiudere il file di configurazione
CREAZIONE DEL SERVIZIO PER FOCALBOARD
Per avviare e gestire Focalboard con Systemd creare un file di servizio systemd per Focalboard con il seguente comando:
|
0 |
nano /lib/systemd/system/focalboard.service |
Quindi aggiungere le seguenti righe:
|
0 1 2 3 4 5 6 7 8 9 10 11 |
[Unit] Description=Focalboard server [Service] Type=simple Restart=always RestartSec=5s ExecStart=/opt/focalboard/bin/focalboard-server WorkingDirectory=/opt/focalboard [Install] WantedBy=multi-user.target |
Salvare e chiudere il file di configurazione
Riavviare il demone systemd con il comando:
|
0 |
systemctl daemon-reload |
Quindi abilitare e avviare Focalboard con i seguenti comandi:
|
0 1 |
systemctl start focalboard systemctl enable focalboard |
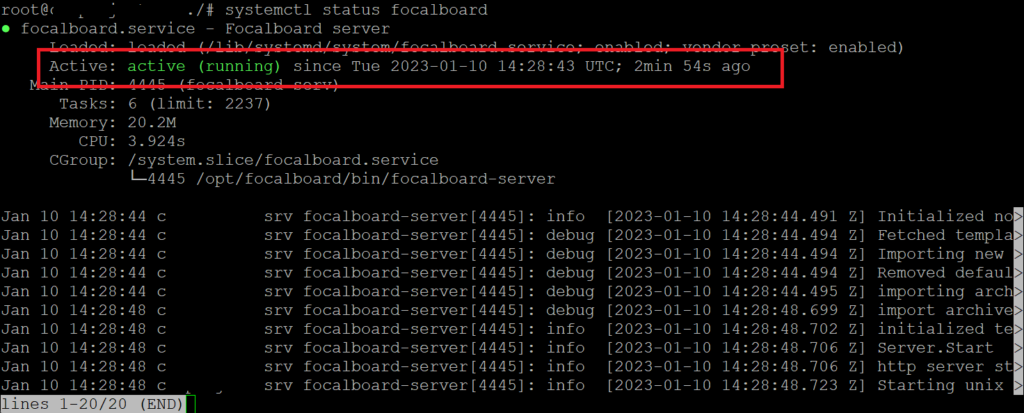
Verificare lo stato del servizio con il comando:
|
0 |
systemctl status focalboard |
Se è tutto OK dovremmo vedere una schermata come quella sovrastante
A questo punto, Focalboard è avviato e in ascolto sulla porta 8000.
E’ possibile controllare le sue porte in ascolto usando il seguente comando:
|
0 |
ss -antpl | grep focalboard |
Dovremmo vedere le porte in ascolto come mostrato nell’immagine sovrastante
CONFIGURAZIONE DI NGINX COME REVERSE PROXY
E’ una buona idea installare e configurare Nginx come reverse proxy per accedere a Focalboard tramite la porta 80.
Innanzitutto, installare il server Nginx con il seguente comando:
|
0 |
apt-get install nginx -y |
Dopo aver installato il server Nginx, creare un file di configurazione dell’host virtuale Nginx con il comando:
|
0 |
nano /etc/nginx/conf.d/focalboard.conf |
Quindi incollare all’interno del seguenti righe:
|
0 1 2 3 4 5 6 7 8 9 10 11 12 13 14 15 16 17 18 19 20 21 22 23 24 25 26 27 28 29 30 31 32 33 34 35 36 37 38 39 40 41 42 43 44 45 46 47 48 |
upstream focalboard { server localhost:8000; keepalive 32; } server { listen 80; server_name focalboard.dominio.com; location ~ /ws/* { proxy_set_header Upgrade $http_upgrade; proxy_set_header Connection "upgrade"; client_max_body_size 50M; proxy_set_header Host $http_host; proxy_set_header X-Real-IP $remote_addr; proxy_set_header X-Forwarded-For $proxy_add_x_forwarded_for; proxy_set_header X-Forwarded-Proto $scheme; proxy_set_header X-Frame-Options SAMEORIGIN; proxy_buffers 256 16k; proxy_buffer_size 16k; client_body_timeout 60; send_timeout 300; lingering_timeout 5; proxy_connect_timeout 1d; proxy_send_timeout 1d; proxy_read_timeout 1d; proxy_pass http://focalboard; } location / { client_max_body_size 50M; proxy_set_header Connection ""; proxy_set_header Host $http_host; proxy_set_header X-Real-IP $remote_addr; proxy_set_header X-Forwarded-For $proxy_add_x_forwarded_for; proxy_set_header X-Forwarded-Proto $scheme; proxy_set_header X-Frame-Options SAMEORIGIN; proxy_buffers 256 16k; proxy_buffer_size 16k; proxy_read_timeout 600s; proxy_cache_revalidate on; proxy_cache_min_uses 2; proxy_cache_use_stale timeout; proxy_cache_lock on; proxy_http_version 1.1; proxy_pass http://focalboard; } } |
ATTENZIONE: al posto di focalboard.dominio.com inserire il nome FQDN del server
Salvare e chiudere il file di configurazione
Verificare che il file di configurazione non abbia nessun errore con il comando:
|
0 |
nginx -t |
Se è tutto ok dovremmo vedere le seguenti righe:
nginx: the configuration file /etc/nginx/nginx.conf syntax is ok
nginx: configuration file /etc/nginx/nginx.conf test is successful
Riavviare Nginx con il comando:
|
0 |
systemctl restart nginx |
Verifricare lo stato di Nginx con il comando:
|
0 |
systemctl status nginx |
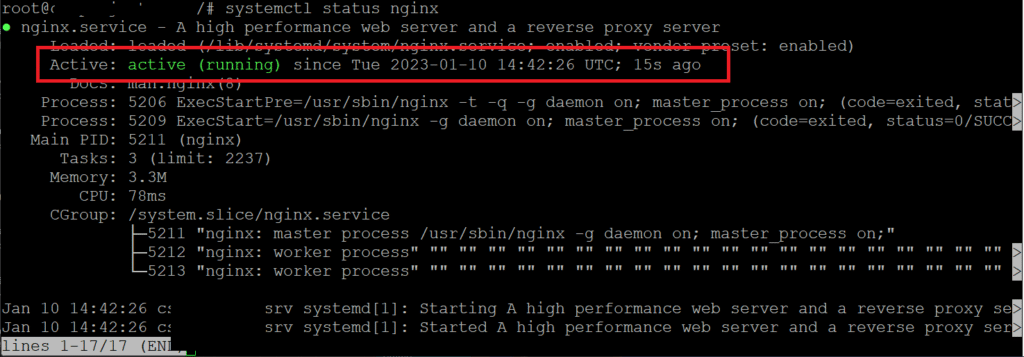
Se è tutto OK dovremmo vedere una schermata come quella sovrastante
ACCESSO DA INTERFACCIA WEB DI FOCALBOARD
Aprire un Web Browser quindi richiamare il link
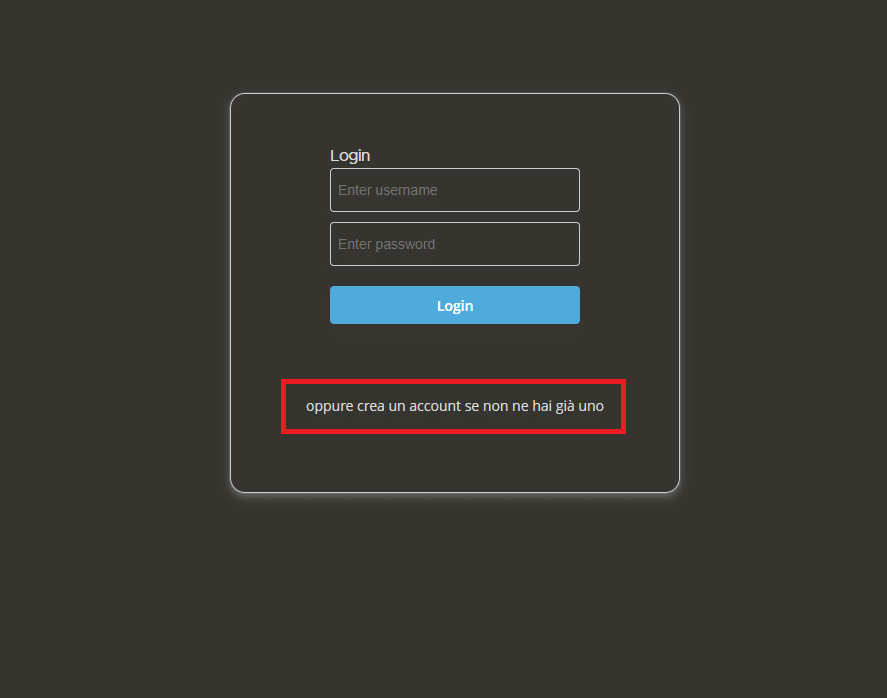
http://focalboard.dominio.com/login
Cliccare su oppure crea un account se non ne hai già uno
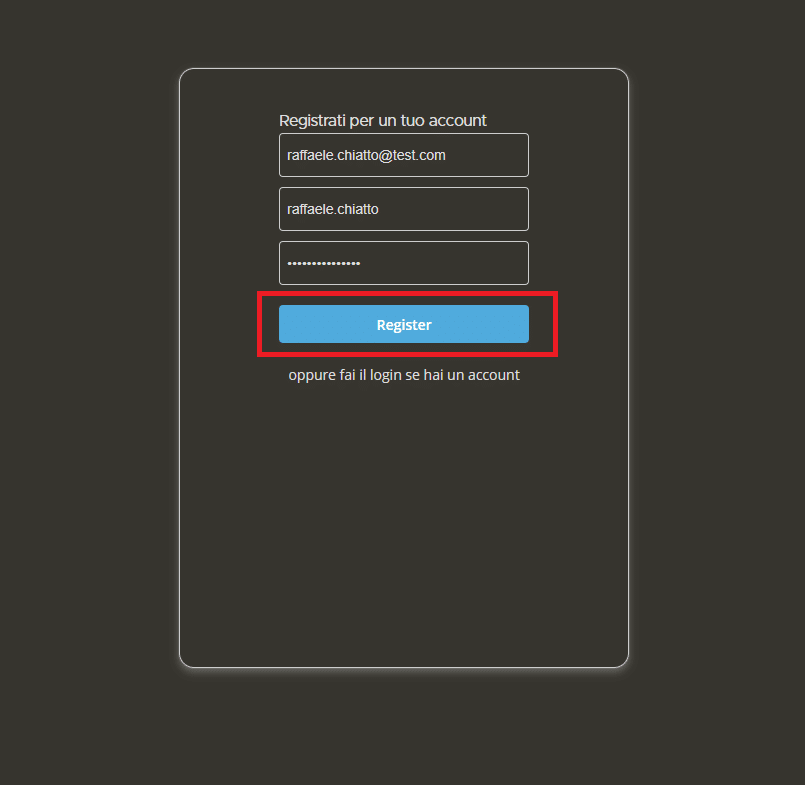
Inserire le mail, lo username e la password quindi cliccare Register
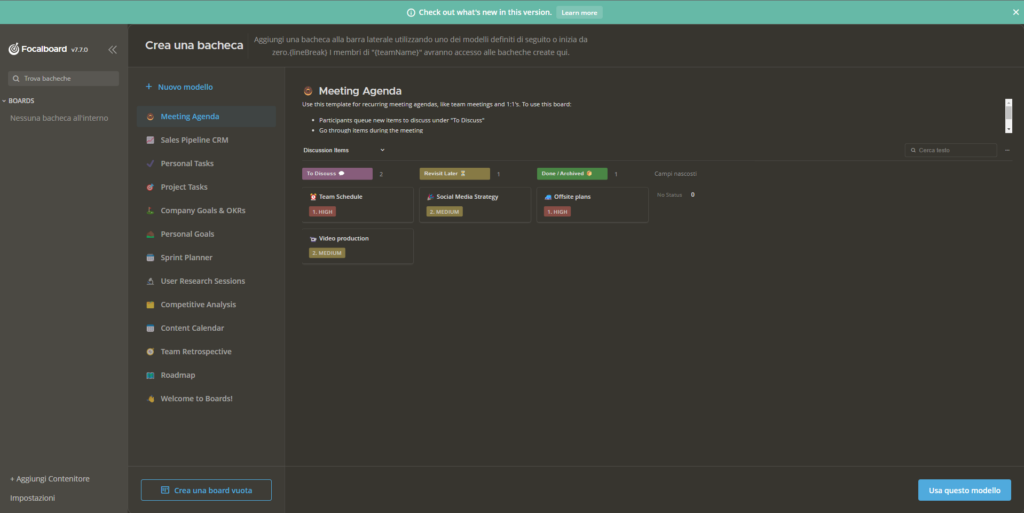
Se è tutto Ok dovremmo accedere alla Dashboard di FocalBoard come mostrato nell’immagine sovrastante
ABILITARE SSL IN FOCALBOARD
Per motivi di sicurezza, è una buona idea proteggere Focalboard con Let’s Encrypt SSL. Successivamente, installare il pacchetto client Certbot per installare e gestire Let’s Encrypt SSL.
Innanzitutto, installa Certbot con il seguente comando:
|
0 |
apt-get install python3-certbot-nginx -y |
Al termine dell’installazione, eseguire il seguente comando per installare Let’s Encrypt SSL sul tuo sito web:
|
0 |
certbot --nginx -d focalboard.dominio.com |
Ti verrà chiesto di fornire un indirizzo email valido e di accettare i termini di servizio come mostrato di seguito:
|
0 1 2 3 4 5 6 7 8 9 10 11 12 13 14 15 16 17 18 19 20 21 22 23 24 25 26 27 28 29 |
No VM guests are running outdated hypervisor (qemu) binaries on this host. root@cs-project-srv:~# certbot --nginx -d focalboard.dominio.com Saving debug log to /var/log/letsencrypt/letsencrypt.log Enter email address (used for urgent renewal and security notices) (Enter 'c' to cancel): mail@dominio.com - - - - - - - - - - - - - - - - - - - - - - - - - - - - - - - - - - - - - - - - Please read the Terms of Service at https://letsencrypt.org/documents/LE-SA-v1.3-September-21-2022.pdf. You must agree in order to register with the ACME server. Do you agree? - - - - - - - - - - - - - - - - - - - - - - - - - - - - - - - - - - - - - - - - (Y)es/(N)o: Y - - - - - - - - - - - - - - - - - - - - - - - - - - - - - - - - - - - - - - - - Would you be willing, once your first certificate is successfully issued, to share your email address with the Electronic Frontier Foundation, a founding partner of the Let's Encrypt project and the non-profit organization that develops Certbot? We'd like to send you email about our work encrypting the web, EFF news, campaigns, and ways to support digital freedom. - - - - - - - - - - - - - - - - - - - - - - - - - - - - - - - - - - - - - - - - (Y)es/(N)o: Y Account registered. Requesting a certificate for focalboard.dominio.com Obtaining a new certificate Performing the following challenges: http-01 challenge for focalboard.dominio.com Waiting for verification... Cleaning up challenges Deploying Certificate to VirtualHost /etc/nginx/conf.d/focalboard.conf |
Successivamente, scegliere se reindirizzare o meno il traffico HTTP su HTTPS come mostrato di seguito:
|
0 1 2 3 4 5 |
1: No redirect - Make no further changes to the webserver configuration. 2: Redirect - Make all requests redirect to secure HTTPS access. Choose this for new sites, or if you're confident your site works on HTTPS. You can undo this change by editing your web server's configuration. - - - - - - - - - - - - - - - - - - - - - - - - - - - - - - - - - - - - - - - - Select the appropriate number [1-2] then [enter] (press 'c' to cancel): 2 |
Digitare 2 e premere INVIO per completare l’installazione.
Se abbiamo fatto tutto correttamente dovremmo vedere il seguente output:
|
0 1 2 3 4 5 6 7 8 9 10 11 12 13 14 15 16 17 18 19 20 21 22 23 24 25 26 27 28 29 30 |
Redirecting all traffic on port 80 to ssl in /etc/nginx/conf.d/focalboard.conf - - - - - - - - - - - - - - - - - - - - - - - - - - - - - - - - - - - - - - - - Congratulations! You have successfully enabled https://focalboard.dominio.com You should test your configuration at: https://www.ssllabs.com/ssltest/analyze.html?d=focalboard.dominio.com - - - - - - - - - - - - - - - - - - - - - - - - - - - - - - - - - - - - - - - - IMPORTANT NOTES: - Congratulations! Your certificate and chain have been saved at: /etc/letsencrypt/live/focalboard.dominio.com/fullchain.pem Your key file has been saved at: /etc/letsencrypt/live/focalboard.dominio.com/privkey.pem Your cert will expire on 2022-11-21. To obtain a new or tweaked version of this certificate in the future, simply run certbot again with the "certonly" option. To non-interactively renew *all* of your certificates, run "certbot renew" - Your account credentials have been saved in your Certbot configuration directory at /etc/letsencrypt. You should make a secure backup of this folder now. This configuration directory will also contain certificates and private keys obtained by Certbot so making regular backups of this folder is ideal. - If you like Certbot, please consider supporting our work by: Donating to ISRG / Let's Encrypt: https://letsencrypt.org/donate Donating to EFF: https://eff.org/donate-le - We were unable to subscribe you the EFF mailing list because your e-mail address appears to be invalid. You can try again later by visiting https://act.eff.org. |
A questo punto sarà possibile richiamare il nostro Focalboard in tutta sicurezza utilizzando un certificato SSL.




![Errore in LibreNMS: Python3 module issue found: ‘Required packages: [‘PyMySQL!=1.0.0’, ‘python-dotenv’, ‘redis>=4.0’, ‘setuptools’, ‘psutil>=5.6.0’, ‘command_runner>=1.3.0’]](https://www.raffaelechiatto.com/wp-content/uploads/2024/09/Errore_in_LibreNMS_Python3_module_issue_found-1080x675.png)







0 commenti