
Che cos’è uno stack LEMP? È praticamente uno stack simile di componenti come LAMP, tranne che Apache è stato sostituito da Nginx.
Pronunciato “engine-x”, che spiega la E su “LEMP”, nginx è un’applicazione proxy HTTP con impronte di impronta decisamente più ridotte rispetto ad Apache, che gli consente di gestire un maggior carico di richieste HTTP.
Secondo Wikipedia, nginx utilizza un approccio asincrono basato sugli eventi per gestire le richieste, rispetto all’approccio predefinito di thread o orientato ai processi di Apache, e la sua architettura modulare basata sugli eventi può fornire prestazioni più prevedibili in presenza di carichi elevati.
INSTALLAZIONE DI NGINX
|
0 1 |
sudo apt-get update sudo apt-get install nginx |
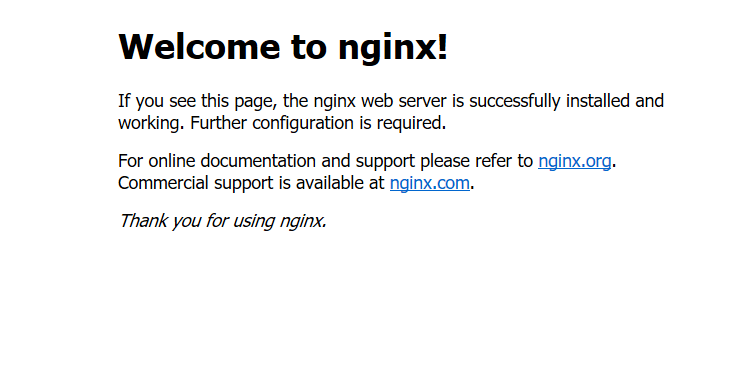
A questo punto se dal browser apriamo la pagina web
http://IP_SERVER_O_NOME_DNS
Dovremmo vedere una schermata come mostrato nell’immagine sovrastante
INSTALLAZIONE DI MYSQL SERVER
A questo punto installiamo il MySQL con il comando:
|
0 |
sudo apt-get install mysql-server |
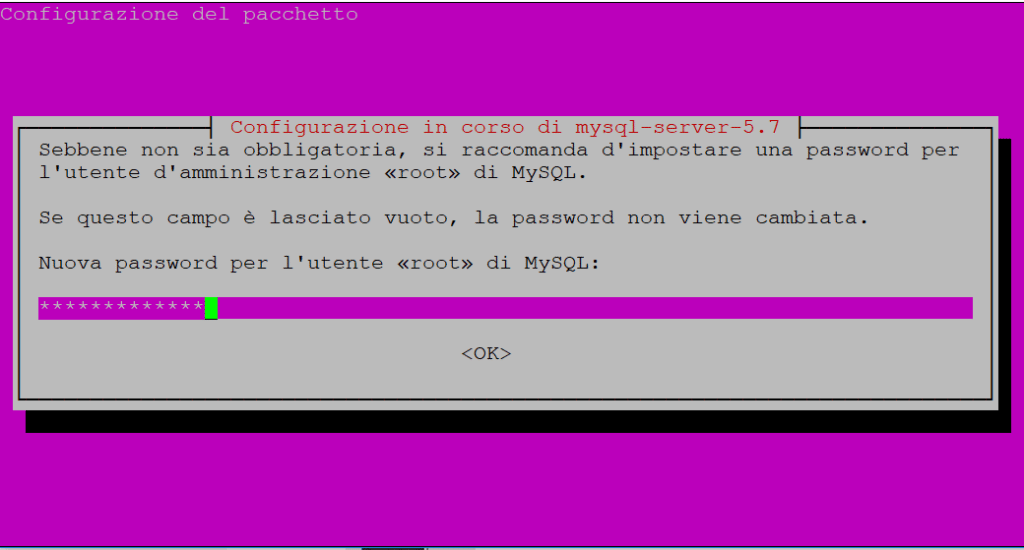
Inseriamo la password per l’utenza di root quindi clicchiamo OK
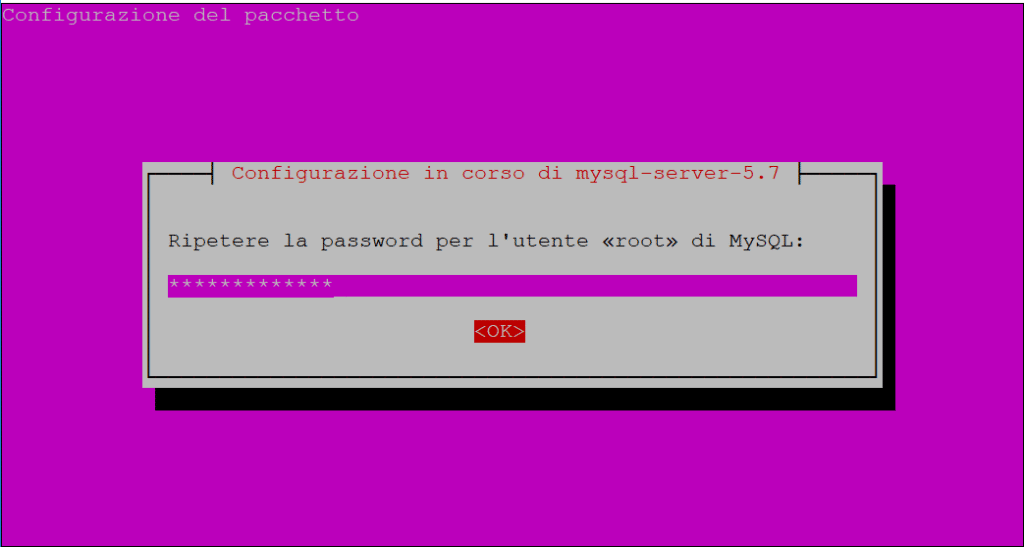
Reinseriamo la password per l’utenza di root quindi clicchiamo OK
Al termine dell’installazione lanciare il seguente comando:
|
0 |
mysql_secure_installation |
Inserire la password dell’utenza di root impostata nel passaggio precedente
|
0 1 2 3 4 |
VALIDATE PASSWORD PLUGIN can be used to test passwords and improve security. It checks the strength of password and allows the users to set only those passwords which are secure enough. Would you like to setup VALIDATE PASSWORD plugin? Press y|Y for Yes, any other key for No: |
premere INVIO
|
0 1 |
Using existing password for root. Change the password for root ? ((Press y|Y for Yes, any other key for No) : |
premere INVIO per confermare la password di root oppure scrivere Yes per cambiarla
|
0 1 2 3 4 5 6 |
By default, a MySQL installation has an anonymous user, allowing anyone to log into MySQL without having to have a user account created for them. This is intended only for testing, and to make the installation go a bit smoother. You should remove them before moving into a production environment.Remove anonymous users? (Press y|Y for Yes, any other key for No) : Yes |
Scrivere Yes per rimuovere gli utenti anonimi
|
0 1 2 3 |
Normally, root should only be allowed to connect from 'localhost'. This ensures that someone cannot guess at the root password from the network. Disallow root login remotely? (Press y|Y for Yes, any other key for No) : |
premere INVIO
|
0 1 2 3 4 |
By default, MySQL comes with a database named 'test' that anyone can access. This is also intended only for testing, and should be removed before moving into a production environment. Remove test database and access to it? (Press y|Y for Yes, any other key for No) : |
premere INVIO per rimuovere i database di test
|
0 1 2 |
Reloading the privilege tables will ensure that all changes made so far will take effect immediately. Reload privilege tables now? (Press y|Y for Yes, any other key for No) : Yes |
Scrivere Yes per riapplicare i privilegi
Se è tutto ok dovremmo vedere :
|
0 |
All done! |
INSTALLAZIONE DI PHP
Lanciare il comando:
|
0 |
sudo apt-get install php-fpm php-mysql |
Ora abbiamo installato i nostri componenti PHP, ma è necessario apportare una leggera modifica alla configurazione per rendere più sicura la nostra installazione.
Apri il file di configurazione principale di php-fpm con i privilegi di root con il comando:
|
0 |
sudo nano /etc/php/7.0/fpm/php.ini |
Cerchiamo nel file il paramentro cgi.fix_pathinfo
Questo di Default dovrebbe essere commentato e avere valore 1
|
0 |
;cgi.fix_pathinfo=1 |
Modifichiamo la stringa come segue:
|
0 |
cgi.fix_pathinfo=0 |
Salviamo il file e chiudiamolo
Riavviamo il servizio PHP con il comando:
|
0 |
sudo systemctl restart php7.0-fpm |
CONFIGURAZIONE DI NGINX PER L’USO DEL PHP
Aprire il file di configurazione del blocco del server Nginx predefinito digitando il comando:
|
0 |
sudo nano /etc/nginx/sites-available/default |
Il file di configurazione dovrebbe essere cosi
|
0 1 2 3 4 5 6 7 8 9 10 11 12 13 14 15 16 17 18 19 20 21 22 23 24 25 26 27 28 29 30 31 32 33 34 35 36 37 38 39 40 41 42 43 44 45 46 47 48 49 50 51 52 53 54 55 56 57 58 59 60 61 62 63 64 65 66 67 68 69 70 71 72 73 74 75 76 77 78 79 80 81 82 83 |
### You should look at the following URL's in order to grasp a solid understanding # of Nginx configuration files in order to fully unleash the power of Nginx. # http://wiki.nginx.org/Pitfalls # http://wiki.nginx.org/QuickStart # http://wiki.nginx.org/Configuration # # Generally, you will want to move this file somewhere, and start with a clean # file but keep this around for reference. Or just disable in sites-enabled. # # Please see /usr/share/doc/nginx-doc/examples/ for more detailed examples. ## # Default server configuration # server { listen 80 default_server; listen [::]:80 default_server; # SSL configuration # # listen 443 ssl default_server; # listen [::]:443 ssl default_server; # # Note: You should disable gzip for SSL traffic. # See: https://bugs.debian.org/773332 # # Read up on ssl_ciphers to ensure a secure configuration. # See: https://bugs.debian.org/765782 # # Self signed certs generated by the ssl-cert package # Don't use them in a production server! # # include snippets/snakeoil.conf; root /var/www/html; # Add index.php to the list if you are using PHP index index.html index.htm index.nginx-debian.html; server_name _; location / { # First attempt to serve request as file, then # as directory, then fall back to displaying a 404. try_files $uri $uri/ =404; } # pass the PHP scripts to FastCGI server listening on 127.0.0.1:9000 # #location ~ \.php$ { # include snippets/fastcgi-php.conf; # # # With php7.0-cgi alone: # fastcgi_pass 127.0.0.1:9000; # # With php7.0-fpm: # fastcgi_pass unix:/run/php/php7.0-fpm.sock; #} # deny access to .htaccess files, if Apache's document root # concurs with nginx's one # #location ~ /\.ht { # deny all; #} } # Virtual Host configuration for example.com # # You can move that to a different file under sites-available/ and symlink that # to sites-enabled/ to enable it. # #server { # listen 80; # listen [::]:80; # # server_name example.com; # # root /var/www/example.com; # index index.html; # # location / { # try_files $uri $uri/ =404; # } #} |
Di seguito le modifiche che bisogna apportare
1) Innanzitutto, dobbiamo aggiungere index.php come primo valore della nostra direttiva di indice in modo che i file denominati index.php vengano visualizzati
2) Possiamo modificare la direttiva server_name in modo che faccia riferimento al nome di dominio del nostro server o all’indirizzo IP.
Per l’effettiva elaborazione PHP, abbiamo solo bisogno di decommentare una porzione del file che gestisce le richieste PHP rimuovendo i simboli sterlina (#) da davanti a ogni riga.
Di seguito il blocco da decommentare:
|
0 1 2 3 4 5 6 7 8 9 10 11 |
server_name NOME DEL SERVER O IP; location / { try_files $uri $uri/ =404;} location ~ \.php$ { include snippets/fastcgi-php.conf; fastcgi_pass unix:/run/php/php7.0-fpm.sock; } location ~ /\.ht { deny all; } } |
Al termine delle modifiche il file dovrebbe essere cosi:
|
0 1 2 3 4 5 6 7 8 9 10 11 12 13 14 15 16 17 18 19 20 21 22 23 24 |
server { listen 80 default_server; listen 80 default_server; listen [::]:80 default_server; root /var/www/html; index index.php index.html index.htm index.nginx-debian.html; server_name NOME DEL SERVER O IP; location / { try_files $uri $uri/ =404; } location ~ \.php$ { include snippets/fastcgi-php.conf; fastcgi_pass unix:/run/php/php7.0-fpm.sock; } location ~ /\.ht { deny all; } } |
Salvare e chiudere il file di configurazione.
Per testare se la configurazione è corretta lanciamo il comando:
|
0 |
sudo nginx -t |
Se è tutto corretto dovremmo leggere le seguenti righe:
|
0 1 |
nginx: the configuration file /etc/nginx/nginx.conf syntax is ok nginx: configuration file /etc/nginx/nginx.conf test is successful |
Riavviamo nginx con il comando:
|
0 |
sudo systemctl reload nginx |
CREAZIONE DEL FILE PHP PER TESTARE LA CONFIGURAZIONE
Creaimo il file info.php con il comando:
|
0 |
sudo nano /var/www/html/info.php |
All’interno del file incolliamo questo codice:
|
0 1 |
<?php phpinfo(); |
Salviamo il file e chiudiamolo
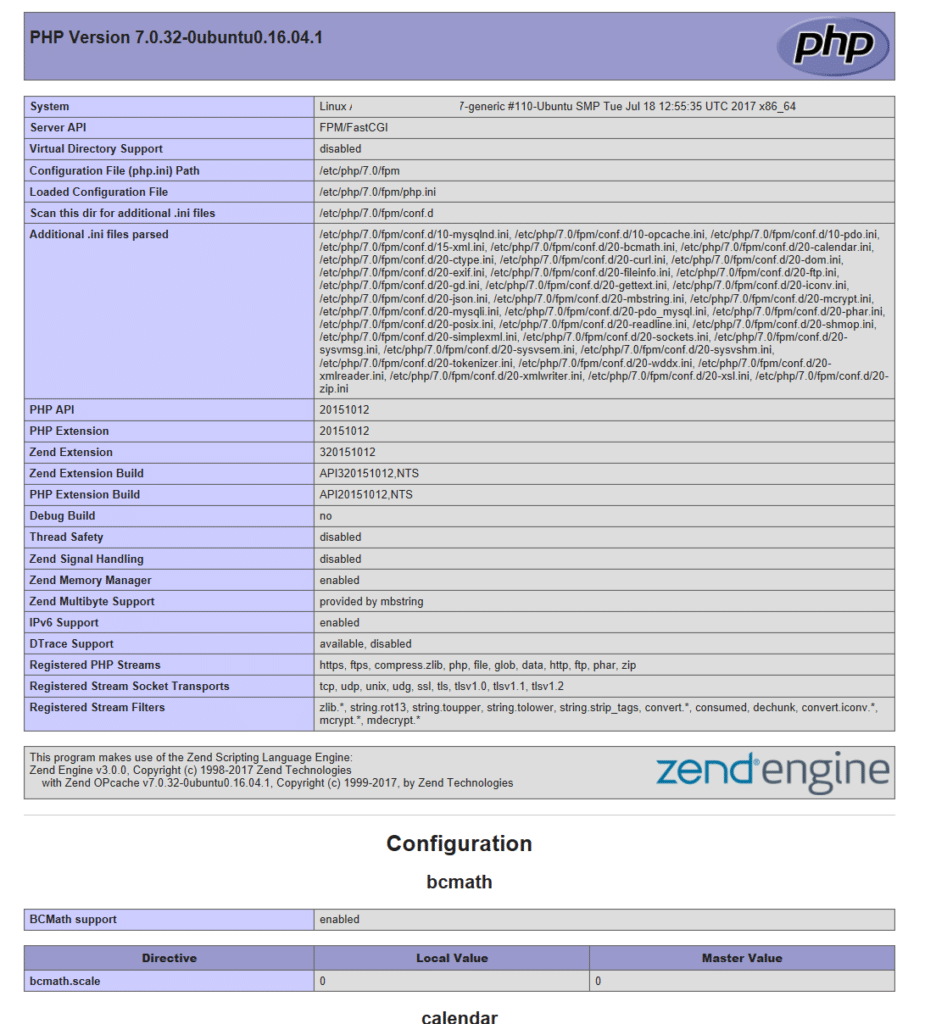
Adesso se da un browser richiamiamo il link:
http://IP_SERVER/info.php
Dovremmo vedere una schermata come quella sovrastante
Per rimuovere il file info.php lanciare il seguente comando:
|
0 |
sudo rm /var/www/html/info.php |


















0 commenti